Set up forms
What is needed: Simply Static Pro
Setting up forms on your static website often requires using an external service. Simply Static tries to reduce the number of services involved by sending form submissions from your static website to your dynamic WordPress website.
Prerequisites
You need a WordPress website that allows CORS requests and one of the supported form plugins (currently Contact Form 7, Elementor Forms, or Gravity Forms).
Configure Forms
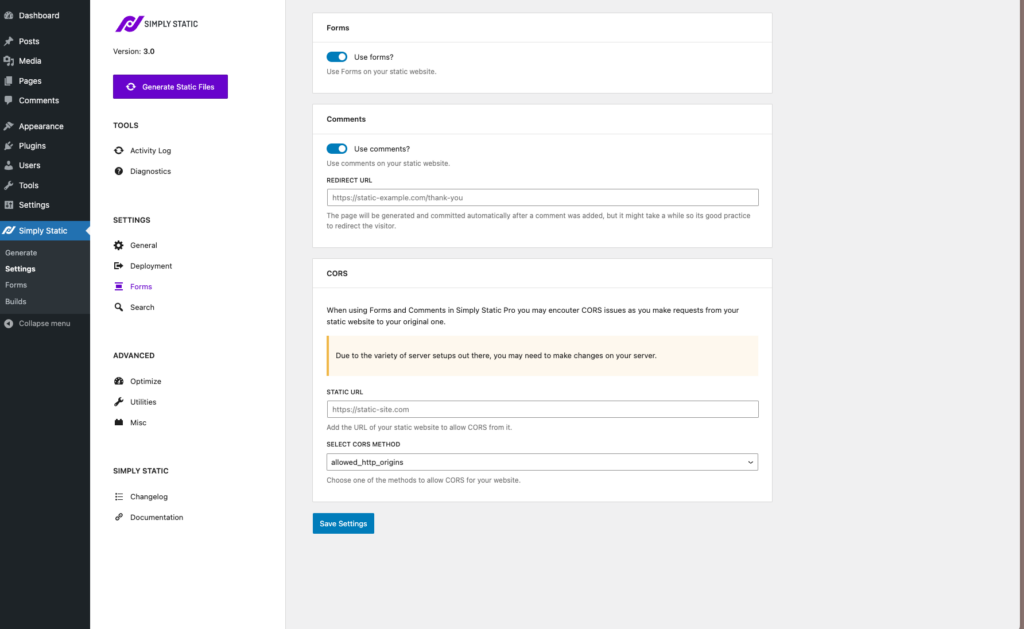
Go to Simply Static -> Settings -> Forms, and we can start configuring the required settings to start supporting forms on your static website.
Use Forms?
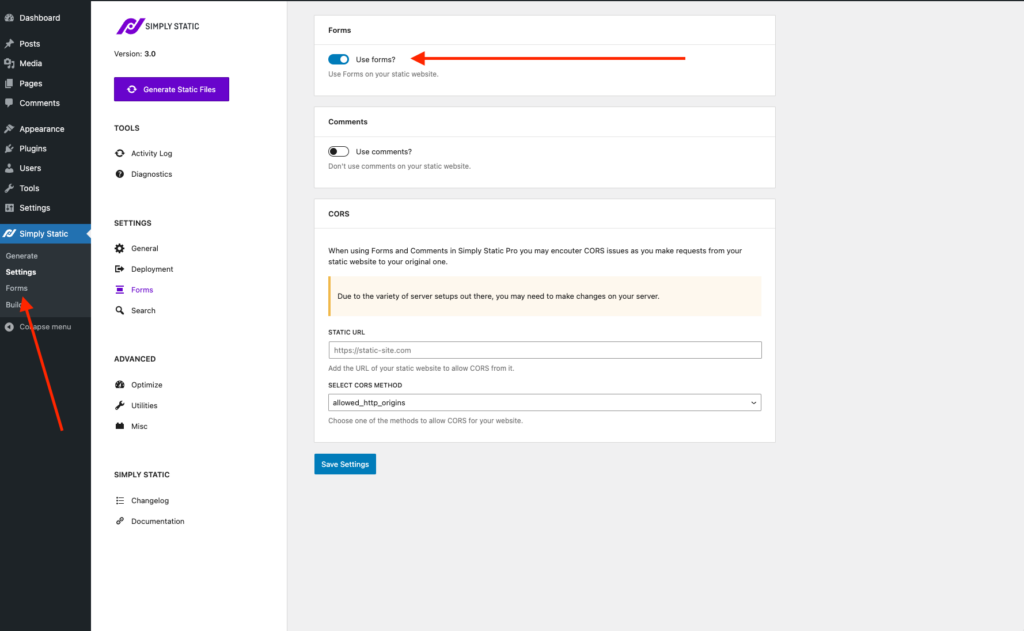
Activate the toggle on the page. That’s it!
Once you saved the settings, you will notice that there is a new submenu being added to the Simply Static settings:
Setting up a form in Contact Form 7
Let’s start by setting up a pretty simple Contact Form 7 form that we use to integrate with Simply Static.

What is important for us here are the name attributes. In Contact Form 7, each form field you add has a unique name – these are the name attributes of the field. In our case, there are four name attributes:
- your-name
- your-email
- your-subject
- your-message
The last bit of information we need is the form ID. Since the release of Contact Form 7 5.8, you can no longer copy the ID from the admin. Instead, you get it by inspecting the parent container in the frontend:
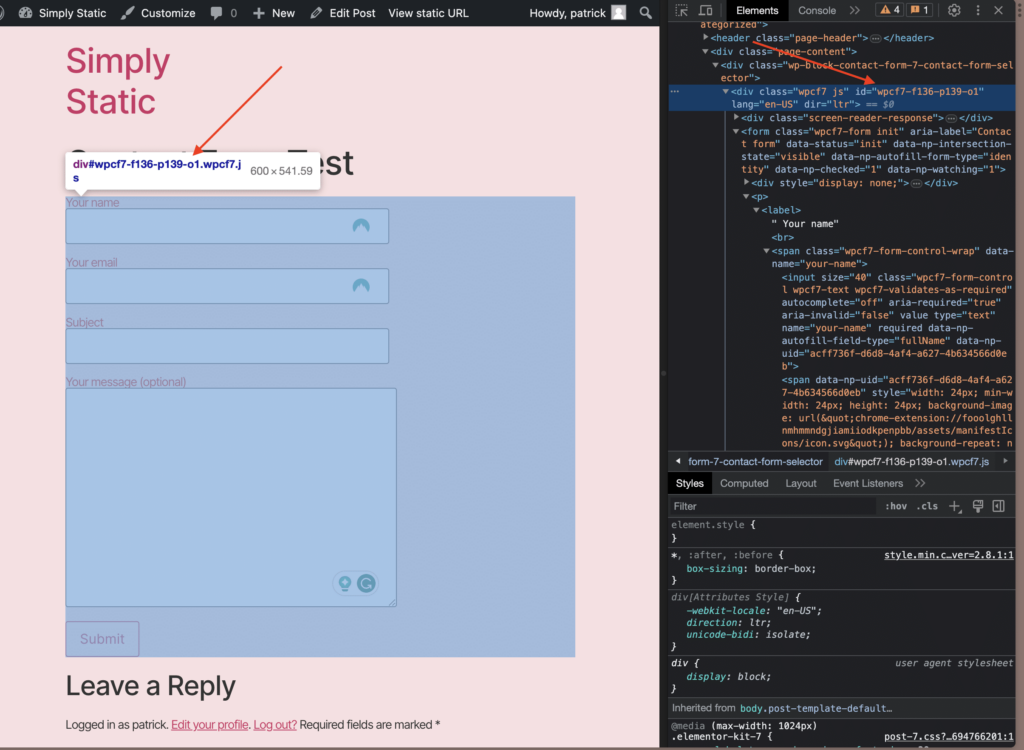
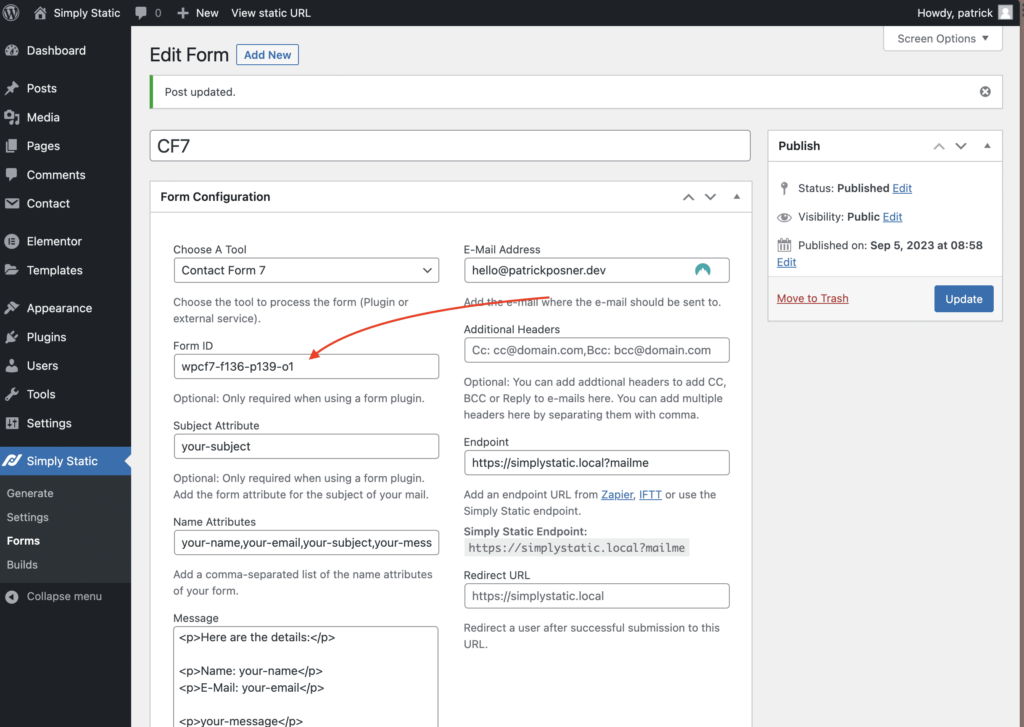
Once copied, add it to the ID field in the form connector:
Setting up a form in Gravity Forms
There are some differences in getting the required information within Gravity Forms compared to Contact Form 7. So let’s quickly set up a new form in Gravity Forms:

As you may have noticed, Gravity Forms does not display the name attributes within the form editor. You also cannot change them, as the plugin adds them dynamically.
To get the name attributes for each of the fields of your form, you have to use your browser’s developer tools. Look at the form from the frontend of your website, inspect each field one by one, and copy the “name” attribute.
Here is what you are looking for:

The last bit of information we need is the form ID. You can copy that from the overview settings page of Gravity Forms:

Enable Client-side validation for Gravity Forms
Gravity Forms only works with server-side validation by default, which means it will not work on your static website. The great news is that there is an official add-on to handle that for you. Take a look at jQuery Validation for Gravity Forms.
Dynamic field population for Gravity Forms
Similar to validating form fields, this usually only works server-side, but thankfully, there is a free and open-source solution that works fine with static websites.
Set up a form with Elementor Forms
All we need to make Elementor Forms work with your static site is the Elementor Form ID.
Visit the page where you have added your form and open the browser's console. Inspect the form element, and you should find a hidden field within the form ID:

Copy the value of the form ID hidden field, go to Simply Static -> Forms, and create a new form integration:

Choose Elementor Forms as the tool and add the form ID you copied earlier.
Configure an endpoint (we used FormSpree in this example) and a Thank You page to which the user is redirected once he submits the form.
Update or Publish the form connection, and you're done with the configuration.
If you want to limit the fields sent to you via email, follow the next section and add only the name attributes you want in the form connection.
If you leave the settings blank, we will send you all the fields.
Getting the name attributes from an Elementor Form
To get the specific name attributes from an Elementor Form, you need to switch to the Advanced tab in the field settings:

The ID is the name attribute you are looking for when configuring the form connection in Simply Static.
Set up a form connection in Simply Static
Now that we have all the information needed, we move to Simply Static -> Forms and create a new form.
Remember, we used Contact Form 7, with a form ID of 5 and four name attributes (your-name, your-email, your-subject and your-message).
So a basic integration will look like this:

Choose A tool
Select the form solution you want to use. You can select from Contact Form 7, Gravity Forms, or External Service (like Formspree or Reform, for example).
Form ID
Here you add the ID of your form. This isn’t required for the External Service integration.
Subject Attribute
Choose the subject line. This can either be just a string or a combination of a string combined with one of the name attributes of your form.
An example could be: “New message from your-name”. Simply Static will automatically recognize name attributes within strings and replace them with the submitted data of the visitor.
Name Attributes
Here you add a comma-separated list of all the name attributes you have used in your form. Make sure they are correct and you have added all attributes you like to use later.
Message
That’s the content of the e-mail that is sent to you after a user submits a form on your static website. You can use HTML tags here to format your e-mail accordingly.
E-Mail Address
That e-mail will receive the message once a user submits the form.
Additional Headers
You may want to add CC or BCC headers to send the submissions to multiple e-mail addresses. Use the placeholder suggestion to better understand how a header gets structured.
Endpoint
Simply Static automatically includes an endpoint here for you. You can also replace them to use external services like Zapier or IFTTT. It receives the response from your static website, ensures it’s a valid request (CORS), and handles the e-mail sent to you.
Redirect URL
You should always add a redirect URL to a thank you page. Most form plugins rely on Ajax (not available on your static website) to show a confirmation you will run into trouble. That’s why I highly recommend setting up a Thank you page and adding the URL here.
Also, make sure that the URL is from your static website. You don’t want to redirect users to your WordPress website 😉
Once you configured everything, it’s time to publish your connection.
The forms.json file
The forms.json file connects your static website to your dynamic WordPress website.
Its content will consist of all your form integrations and the settings you configured earlier.
The content may look similar to this:
[{"id":"5","tool":"cf7","endpoint":"https:\/\/simplystatic.local?mailme","redirect_url":"https:\/\/youthful-ramanujan-a94a53.netlify.app"}]
This file will automatically be created once you save a “form config”.
Errors
A small tip: open your browser's developer tools when submitting a form on your static website.
If something fails, you will see an error.
504/503
This happens when the Simply Static Endpoint isn’t reachable. If you use Basic Auth for your WordPress website, make sure you exclude the forms endpoint to make that work.
404
You will most likely see this issue if your form configuration has an error.
Take a look at the webhook URL in your form connection—is the URL correct? Is the form.json file available on your static website?
301
There is a redirect for the webhook URL.
This is also common if you use a plugin to protect your WordPress website. Many of them automatically redirect all incoming requests to your homepage or a certain URL to unlock it.