Deploy to GitHub
What you need: Simply Static Pro
Why deploy to GitHub
Pushing your static site to GitHub gives you a few nice advantages over the ZIP and Local Directory methods:
- Version control, so you have a full history and no need for manual backups.
- A path to publish on GitHub Pages, Cloudflare Pages, Netlify, Kinsta, and other hosts that deploy straight from a repository.
- Automatic push-to-deploy, so changes flow from WordPress to your static site without manual uploads.
GitHub acts as the hub: Simply Static pushes your site to a repository, and your chosen host then publishes it.
Choose the GitHub method
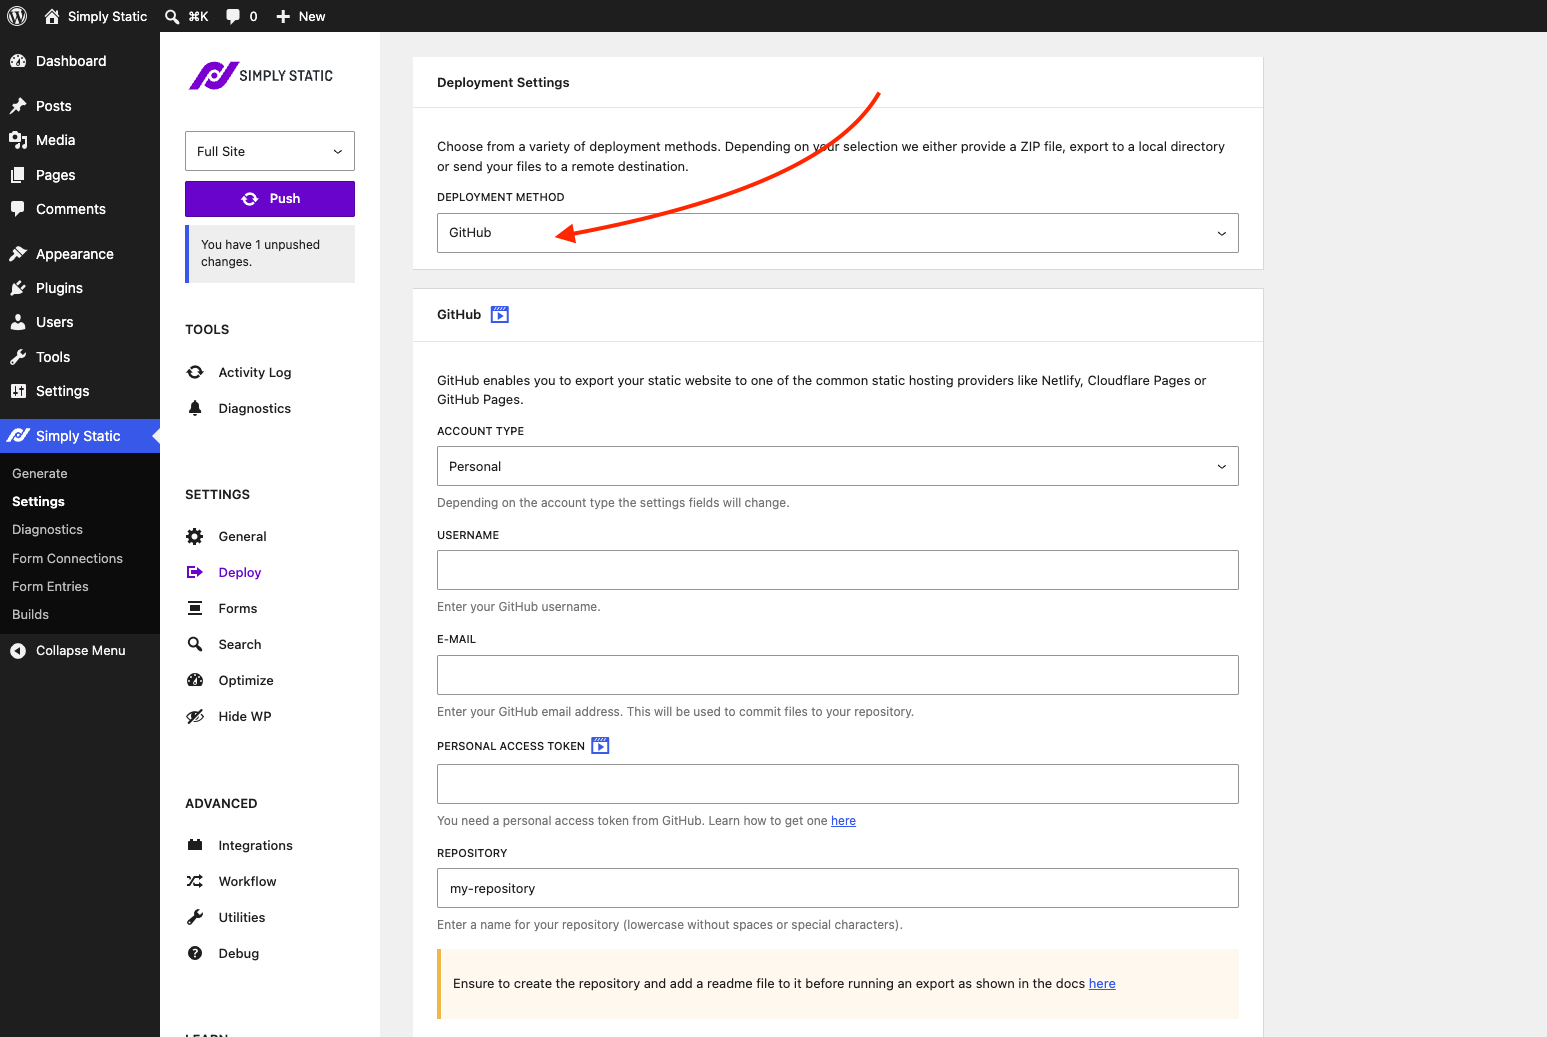
Open Simply Static > Deploy. Under Deployment Settings, set the Deployment Method dropdown to GitHub. The GitHub configuration fields appear below.
Create a personal access token
Simply Static needs a GitHub personal access token to commit files to your repository. If you don't have a GitHub account yet, create one first at github.com/join.
To create the token:
- Log in to GitHub, click your profile picture in the top-right corner, and choose Settings.
- In the left sidebar, open Developer settings.
- Switch to Fine-grained tokens and click Generate new token.
- Give the token a name and an expiration date, then select the repository you want Simply Static to access.
- Open the Repository permissions section, find Contents, and set it to Read & Write.
- Under account permissions, set Email addresses to Read-only.
- Click Generate token and copy the token. You'll paste it into Simply Static in a moment.
Organization accounts: If you're using an organization account and you're an admin, it's best to use the Tokens (classic) option rather than fine-grained tokens.
Complete the configuration
Back in GitHub settings, under Simply Static > Deploy, fill in the remaining fields.
- Account Type: choose Personal or Organization. Some of the fields below change depending on what you pick.
- Username: your GitHub username, or your organization name for an organization account.
- E-mail: the email address tied to your GitHub account. Simply Static uses it to commit files, so make sure it's correct (for organizations, this may differ from your personal address).
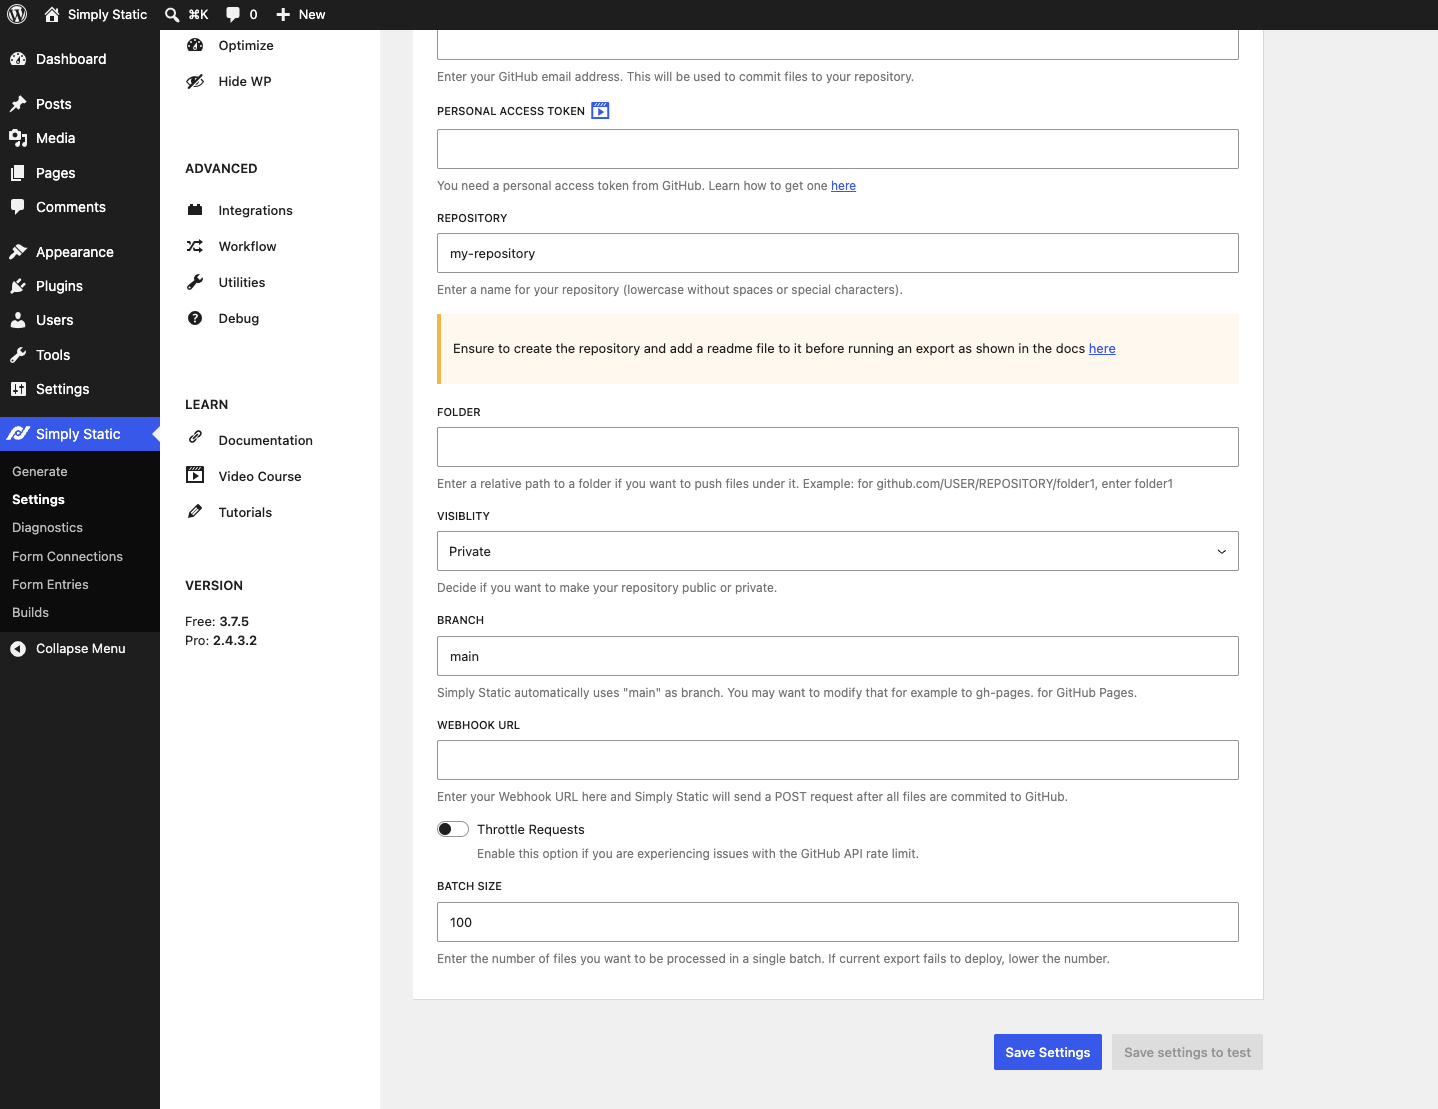
- Personal Access Token: the token you generated above.
- Repository: a name for the repository, in lowercase with no spaces or special characters.
- Folder: optional. Enter a relative path if you want files pushed into a subfolder. For example, to push to
github.com/USER/REPOSITORY/folder1, enterfolder1. - Visibility: choose whether the repository is Public (visible to everyone) or Private (limited to you and anyone you grant access).
- Branch: Simply Static uses
mainby default. Change it to match your host if needed, for example,gh-pagesfor GitHub Pages. - Webhook URL: optional. Enter a URL, and Simply Static sends a POST request to it after all files are committed, which is handy for triggering an external build or deploy.
- Throttle Requests: turn this on if you run into GitHub API rate limit issues.
- Batch Size: how many files are processed in a single batch (default
100). If a push fails to deploy, lower this number.
When everything is filled in, click Save Settings.
Create the repository first
Before your first push, make sure the repository already exists on GitHub and has a README file in it. Simply Static can push files to a repository, but it can't create the repository for you, since the token only grants permission to push.
The easiest way is to tick the "Add a README file" option when you create the repository on GitHub. That gives the repo an initial commit for Simply Static to push onto.
Push your site
With the repository ready and your settings saved, click Push from the panel on the left. Simply Static commits your static files to the repository, and you can follow along under Simply Static > Activity Log.
Publish your repository to a host
Once Simply Static is pushing your site to a GitHub repository, you can connect that repository to whichever static host you prefer.
These platforms monitor your repository and automatically redeploy whenever Simply Static pushes an update, so your live site stays in sync with WordPress.
Because Simply Static commits ready-to-serve static files, you usually don't need a build step on the host. If a host asks for a build command and a publish directory, you can leave the build command empty and point the publish directory at your repository root (or the subfolder you set in the Folder field above).
Setup differs slightly from host to host, and their dashboards change often, so follow each provider's own up-to-date documentation:
- Cloudflare Pages: Git integration guide
- Netlify: Deploy from your repository
- Kinsta Static Site Hosting: Static Site Hosting documentation
- GitHub Pages: Configuring a publishing source (set the Branch field above to match, for example,
gh-pages)