Set up forms
What you need: Simply Static Pro
A static site has no PHP running, so it can't process a form submission on its own. Simply Static bridges that gap, so the forms you already built in WordPress keep working on your static site. There are two ways it can do that: send submissions to a webhook, or embed the live WordPress form.
The best part is that most of this is set up for you automatically.
Enable forms
Go to Simply Static > Forms and turn on Use forms. A few related options sit alongside it:
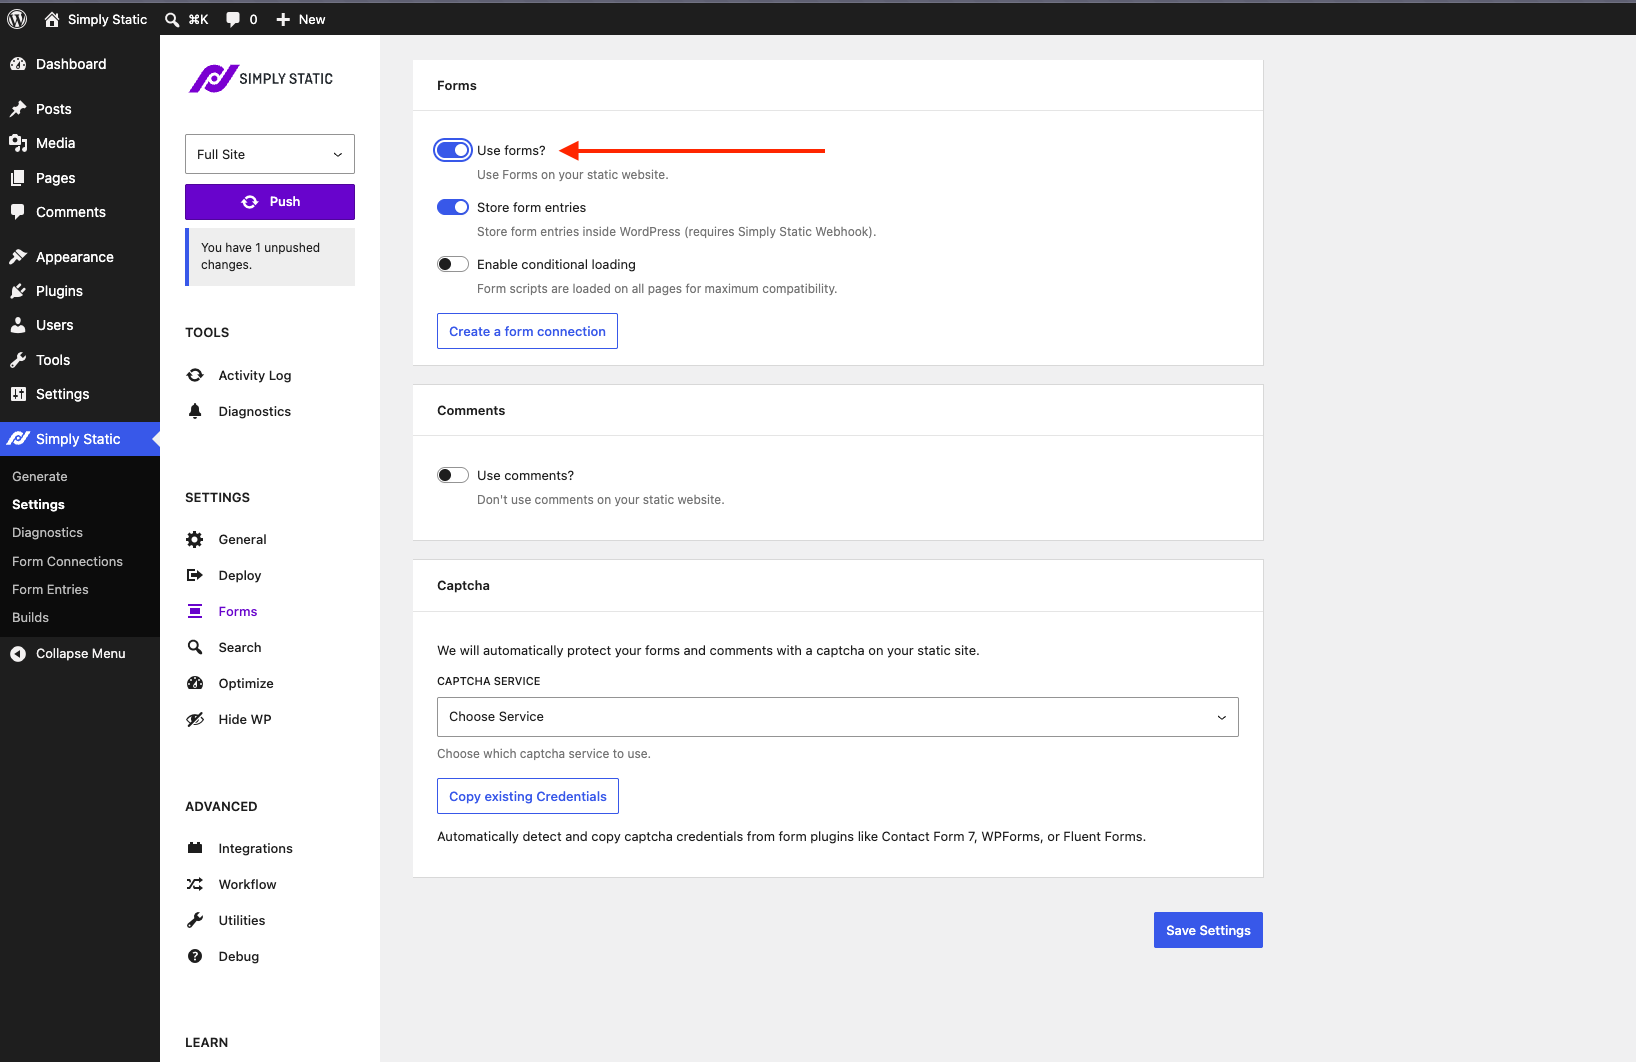
- Use forms? turns the feature on for your static site.
- Store form entries saves each submission inside WordPress so you can read it later under Form Entries. This relies on the Simply Static webhook (more on that below).
- Enable conditional loading is off by default, which means form scripts load on every page for maximum compatibility. Turn it on to load them only on pages that actually contain a form.
- Create a form connection jumps straight to the connection editor. You usually won't need it, thanks to automatic setup.
Automatic setup
This is the big change from older versions: you no longer configure each form by hand.
With Use forms enabled, just run a Push. Simply Static detects the forms on your site and creates the matching form connections for you, including each form's ID. There's nothing to look up and paste in manually.
After the push, your forms work on the static site right away. By default, they submit via Simply Static's own webhook, and if Store form entries is enabled, each submission is saved in WordPress.
The two ways forms can work
Every form connection uses one of two methods:
- Webhook (default): the form quietly submits to a URL in the background. Out of the box this is Simply Static's own WordPress endpoint, which stores each submission as an entry. You can also point it at an external service such as FormSpree or Zapier.
- Embedded: instead of a static copy of the form, Simply Static embeds the live form from your WordPress site. Because the form is served from WordPress, this option needs WordPress to be reachable online.
Adjust a form connection
Even though the setup is automatic, you can fine-tune any connection. Go to Simply Static > Form Connections to see all detected forms, along with their type, plugin, and form ID. Click one to edit it.

Webhook settings

- Form type: set to Webhook.
- Plugin and Form ID: detected automatically. You normally don't need to change these.
- Webhook URL: where submissions are sent. Use the Simply Static endpoint (the default, ending in
/wp-json/simplystatic/v1/entries) to store submissions as entries in WordPress, or paste an external webhook like FormSpree to send them elsewhere. - Custom headers: extra headers sent with the request, separated by commas. For the internal endpoint this includes the Simply Static secret header (
X-Simply-Static-Secret), which lets WordPress verify the request really came from your static site.
If your static site and WordPress are on different domains, submissions to the internal webhook are cross-origin, which the browser may block. If forms fail with a CORS error, see Fixing CORS errors with forms.
Feedback (webhook)
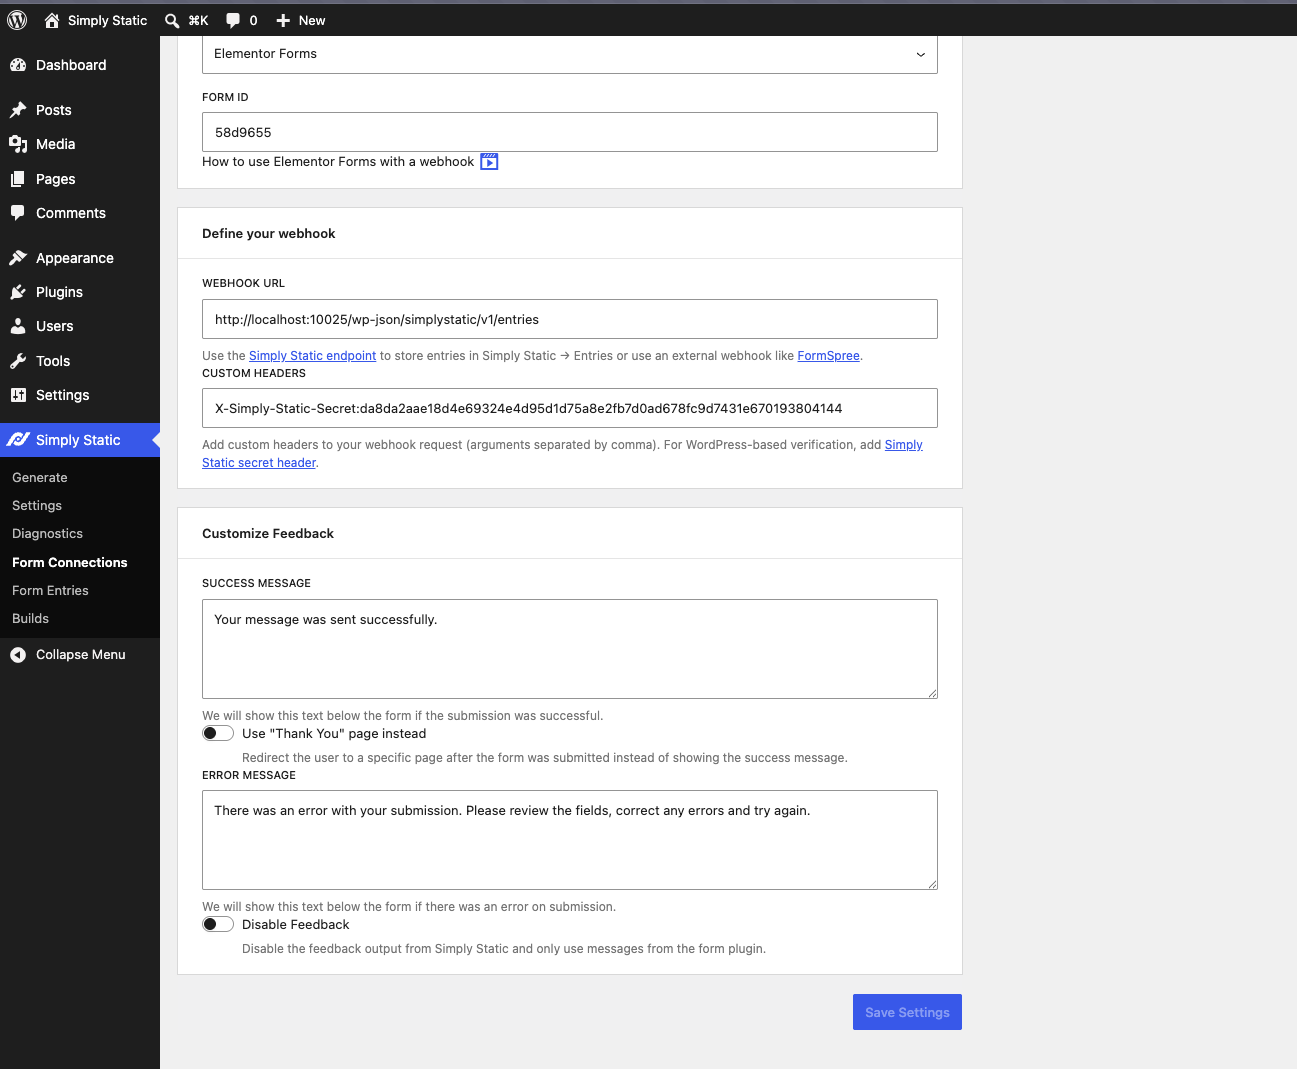
- Success message: shown below the form after a successful submission.
- Use "Thank You" page instead: redirect the visitor to a specific page rather than showing the success message.
- Error message: shown below the form if the submission fails.
- Disable Feedback: turn off Simply Static's own messages and rely on the messages from your form plugin instead.
Embedded settings
To embed the live WordPress form instead of a static copy, set the form type to Embedded Form.
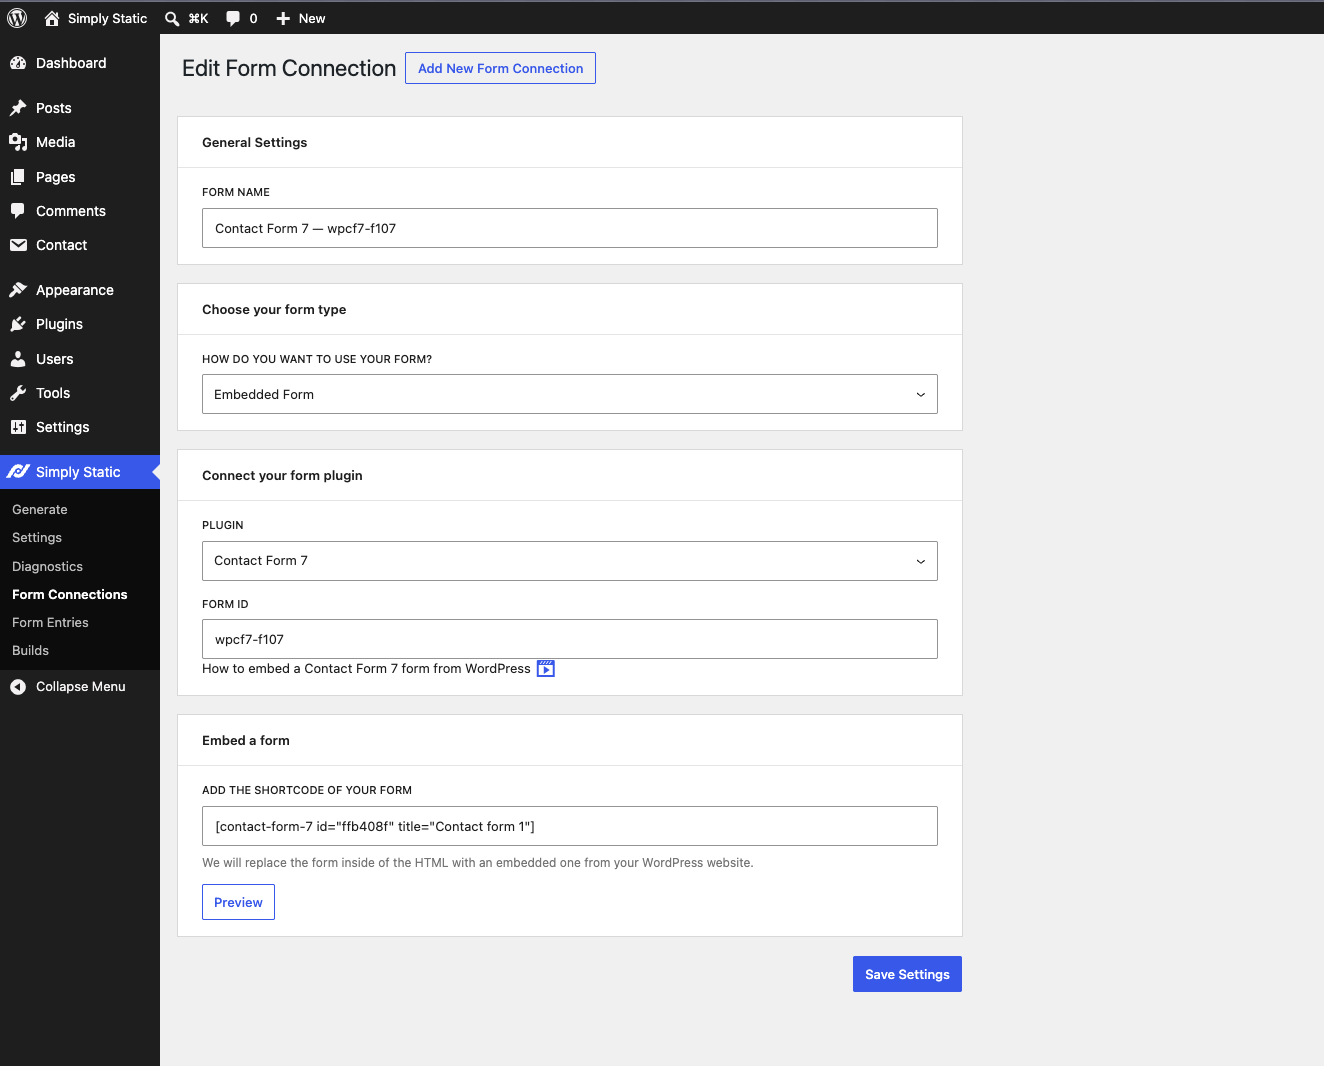
- Add the shortcode of your form. Simply Static replaces the form in your static HTML with the live embedded version from WordPress.
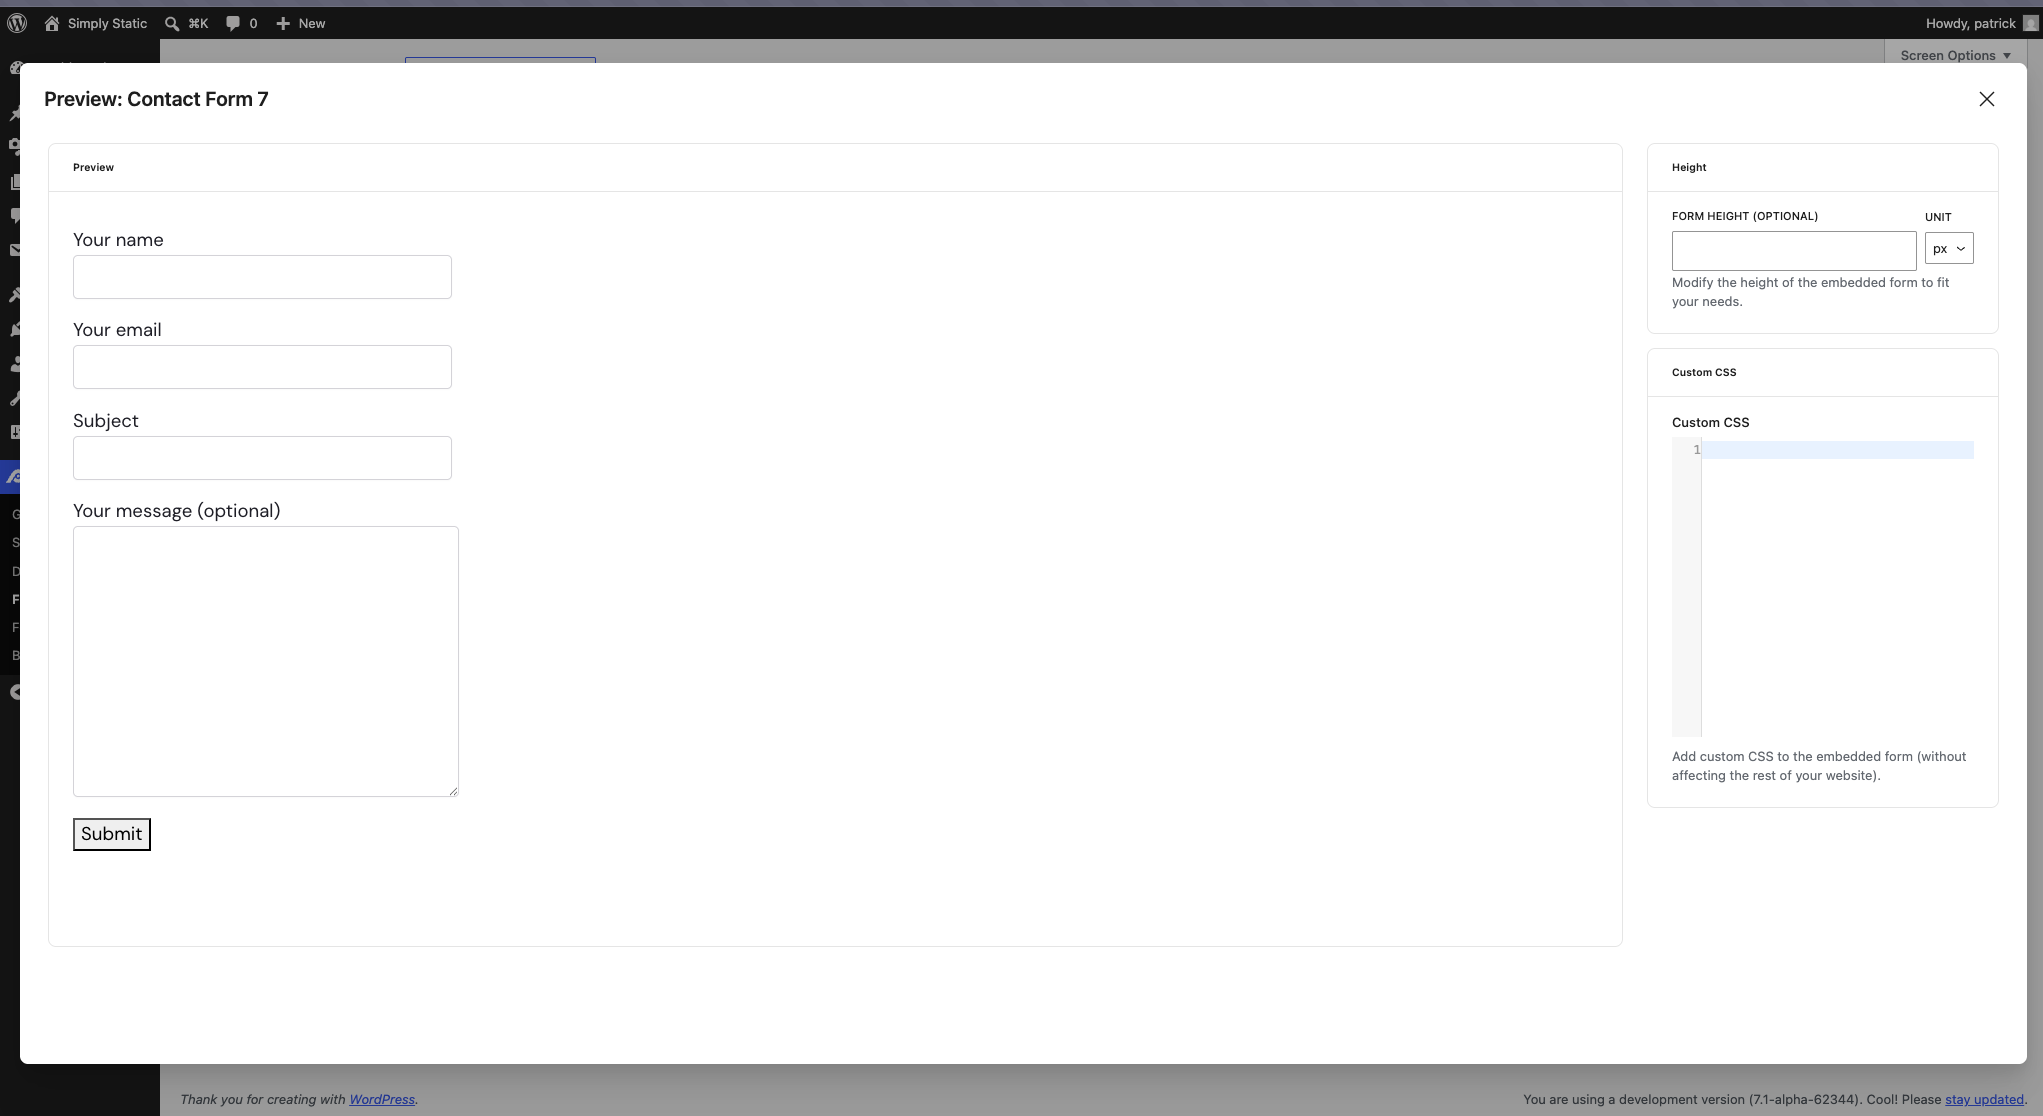
- Preview opens a window where you can set an optional Form height and add Custom CSS that applies only to the embedded form. Custom CSS is handy for hiding elements like cookie banners or pop-ups within the embed.
Embedding needs WordPress to be accessible online, so it isn't available for a purely local install.
View submissions
When you use the internal webhook with Store form entries enabled, every submission is saved in WordPress, where you can read, mark, and delete them under Simply Static > Form Entries. See View form entries for the details.
Protect forms with a captcha
Simply Static can automatically protect your forms with Cloudflare Turnstile or Google reCAPTCHA v3, configured under the Captcha section of Simply Static > Forms. See Protect forms with a captcha for setup.
Supported form plugins
Simply Static works with all the major WordPress form plugins:
- Contact Form 7
- Elementor Forms
- Bricks Forms
- Gravity Forms
- Fluent Forms
- WP Forms
- WS Form
- Kadence Forms
- Forminator
- Ninja Forms
Using something else? Choose Other Plugin when editing a form connection to use a generic integration.